How to Clean Print Heads and Fix Blurry Printouts
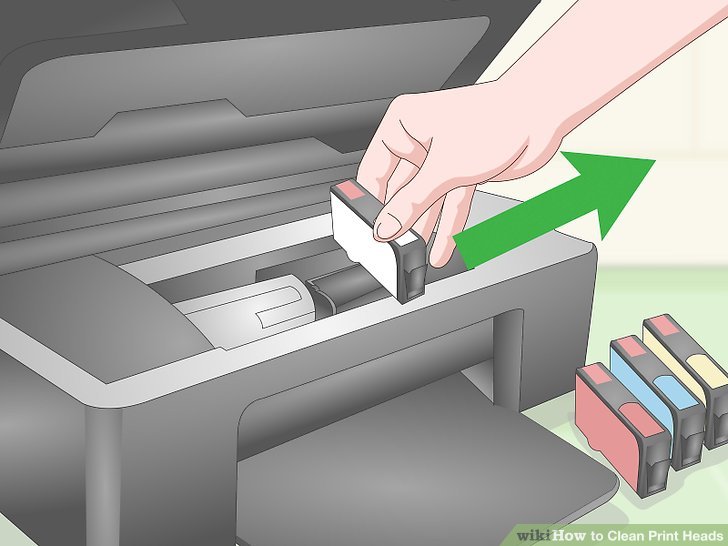
For Inkjet Printers (Common Cause of Blurry Prints) 1. Check Ink Levels Low ink can cause streaks or missing colors. Replace any empty or near-empty cartridges. 2. Run Print Head Cleaning Utility Most printers (HP, Canon, Epson, Brother) have built-in tools. Windows: Go to Control Panel > Devices and Printers Right-click your printer → Printing Preferences Look for “Maintenance” or “Tools” tab Click Clean Printhead or Nozzle Check Mac: Go to System Preferences > Printers & Scanners Select your printer → Options & Supplies > Utility Click Open Printer Utility → choose Cleaning 🔁 Run this 2–3 times if needed. Print a test page each time. 3. Manual Cleaning (If Software Doesn’t Help) ⚠️ Wear gloves and be gentle. Steps: Turn off the printer and unplug it. Remove ink cartridges. Dampen a lint-free cloth or paper towel with distilled water or isopropyl alcohol. Gently wipe the print head nozzles (usually located under the cartridge). Let dry fully (10–15 min), then reinstall cartridges. 4. Align the Print Heads Misalignment causes blurry or double prints. Use the printer’s maintenance settings to run “Align Print Heads”. For Laser Printers 1. Check Toner Cartridge Shake it gently to redistribute toner if it’s low. Replace if it’s near empty or leaking. 2. Clean the Inside Open printer. Use a dry, lint-free cloth or compressed air to remove toner dust inside. Gently clean rollers and corona wire if accessible. Still Blurry? Try This: Use high-quality paper (low-quality absorbs ink unevenly). Print in high-resolution mode. Check for moisture damage or software/driver updates. Summary Table Action Inkjet Laser Clean Print Head Utility ✅ ❌ Manual Cleaning ✅ ✅ (interior) Replace Cartridge/Toner ✅ ✅ Align Print Heads ✅ ❌ Update Printer Driver ✅ ✅
WiFi Printer Not Connecting to Network? Try These Fixes
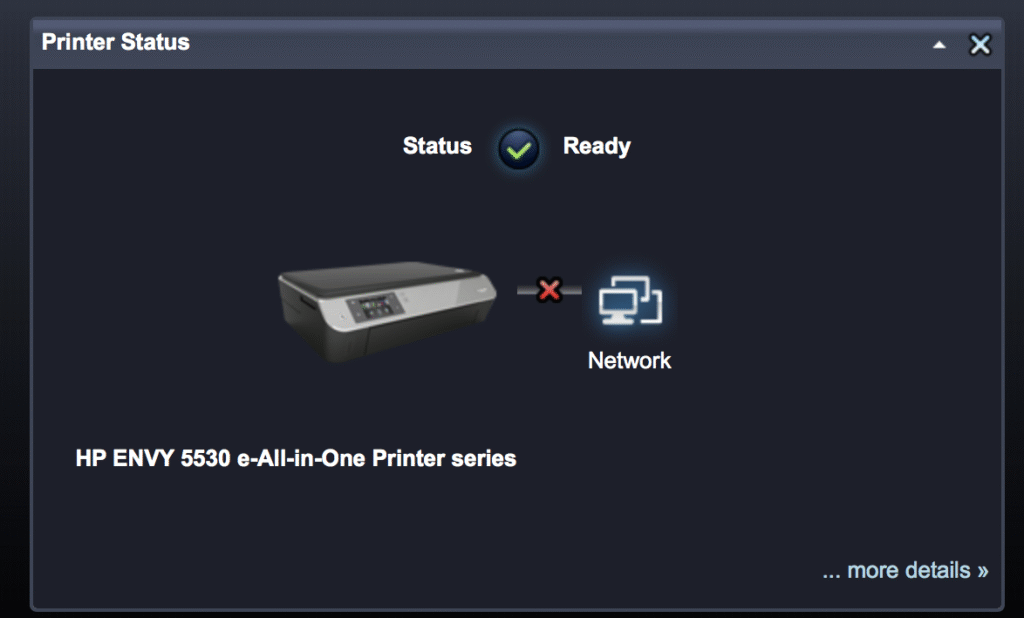
If your WiFi printer isn’t connecting to your network, don’t worry. These step-by-step fixes should help you get back on track: 1. Restart Everything Quick fix for many issues: Restart your printer, router, and computer/phone. Wait 30 seconds before turning them back on. 2. Check WiFi Connection on Printer Use the printer’s display panel to check the WiFi status. Make sure it’s connected to the correct network (SSID). Reconnect manually if needed. 3. Re-Enter WiFi Password If the WiFi password was changed recently, update it on the printer. Mistyped passwords are a common reason for failed connections. 4. Move the Printer Closer to the Router Weak signals cause dropouts. Place the printer within 20-30 feet of the router. 5. Use the Printer’s Wireless Setup Wizard Access the printer’s settings. Choose “Network” > “Wireless Setup Wizard” and follow the steps. 6. Check for IP Address Conflicts Go to your printer’s network settings and note the IP address. If multiple devices use the same IP, it can cause issues. Restarting the router usually assigns a new IP. 7. Update Printer Firmware Go to the printer manufacturer’s website. Download and install the latest firmware for your model. 8. Disable MAC Address Filtering (Temporarily) If enabled on your router, it might block the printer. Log into your router settings and check for MAC filtering. 9. Try Connecting via WPS If your router supports WPS: Press the WPS button on the router. Then press the WPS button on your printer or select WPS from the menu. 10. Reset Printer Network Settings This will erase saved networks and allow a fresh connection. Usually found under Settings > Network > Reset Network Settings. Still not working? Try connecting via USB temporarily to print. Contact the printer manufacturer’s support if it refuses to connect.
How to Clear a Stuck Print Job in the Queue
Method 1: Using the Print Queue Window Open the Print Queue: Press Windows + R, type control printers, and press Enter. Right-click your printer → See what’s printing. Cancel the Print Job: Right-click the stuck job → Cancel. If it doesn’t cancel, proceed to the next method. Method 2: Manually Clear the Print Spooler Stop the Print Spooler Service: Press Windows + R, type services.msc, and press Enter. Scroll down and find Print Spooler. Right-click → Stop. Delete the Print Queue Files: Press Windows + R, type: shell CopyEdit %systemroot%\System32\spool\PRINTERS Press Enter. Delete all files in that folder (they are the stuck jobs). Start the Print Spooler Again: Go back to services.msc. Right-click Print Spooler → Start. Optional: Restart Your PC Sometimes restarting your computer helps finalize clearing the queue. Tips to Avoid This in the Future: Use updated printer drivers. Avoid printing large or corrupted files. Keep your printer firmware up to date.
Top 5 Reasons Your Printer Is Not Printing And How to Fix It
1. Printer is Not Properly Connected Issue: Printer is offline or not connected to the computer or Wi-Fi. Fix: For USB printers: Check the cable connection and try a different USB port. For wireless printers: Ensure both your printer and device are on the same Wi-Fi network. Restart the printer and your computer. Go to Devices and Printers → Right-click your printer → Select “Set as default printer.” 2. Out of Paper, Ink, or Toner Issue: The printer has no paper or the ink/toner is empty or low. Fix: Refill the paper tray. Check ink or toner levels via the printer software. Replace any empty cartridges. Make sure cartridges are properly installed. 3. Print Queue is Stuck Issue: Previous jobs are stuck, preventing new prints. Fix: Go to Control Panel > Devices and Printers. Right-click your printer → Select “See what’s printing.” Cancel or delete all stuck print jobs. Restart the Print Spooler: Press Windows + R, type services.msc Find Print Spooler, right-click → Restart 4. Driver Issues Issue: Missing, outdated, or corrupt printer drivers. Fix: Go to your printer manufacturer’s website. Download and install the latest drivers for your model. Or, open Device Manager → Right-click printer → Update driver. 5. Wrong Printer Selected Issue: You’re sending the job to a different or offline printer. Fix: In your print dialog, select the correct printer. Set your printer as default: Settings > Devices > Printers & scanners Click your printer → Manage → Set as default
How to Fix “Printer Offline” Error on Windows and Mac
Many users encounter the frustrating Printer Offline message, even when everything seems properly connected. This common error can disrupt your workflow but is usually easy to resolve. In this guide, we’ll show you step-by-step solutions to fix it on both Windows and Mac. 1. Check Physical Connections Ensure your printer is powered on and all cables (USB or power) are securely connected. If using WiFi, verify that the printer is connected to the correct network. 2. Set the Printer as Default Go to Settings > Devices > Printers & scanners Select your printer and click Set as default 3. Restart the Print Spooler Service On Windows: Press Windows + R, type services.msc, and hit Enter. Find Print Spooler, right-click, and select Restart. 4. Remove and Reinstall the Printer Sometimes, reinstalling the printer clears up offline issues: Remove the printer from settings Reboot your system Add the printer again 5. Check Mac Printer Settings Go to System Settings > Printers & Scanners Right-click the printer and choose Reset Printing System if necessary 6. Preventing Future Errors Always keep your printer drivers and operating system up to date. Avoid using sleep mode during long idle periods. Need More Help? Explore more troubleshooting guides on PrintsView to fix common printer problems easily.